Part Eight - Rivers
Posted 17 Jan 2022
Posted 17 Jan 2022
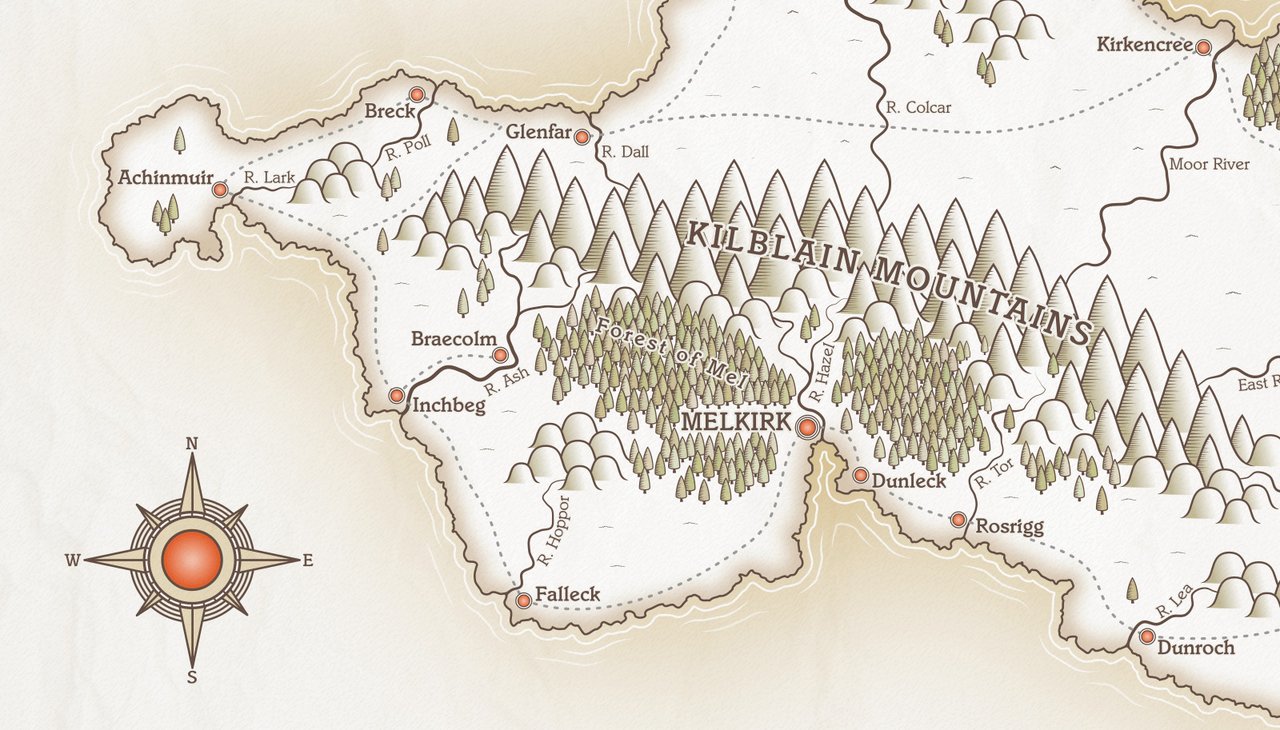
This post is the eighth part of a tutorial series that teaches how to create fantasy maps in Inkscape. This part deals with creating rivers.
Here are the other sections of the tutorial.
Now onto Part Eight!
On our ‘Plan’ layer, we drew out some rivers, but these were straight-line zig-zag shapes that were only a guideline for the rivers’ placement. We’re going to recreate these with smooth curves and some extra wiggly randomness.
Create a new layer called ‘Rivers’. Place this layer BELOW your ‘Mountains’ layer. Some of your rivers will need to have their source hidden by the mountains, so it’s important the Rivers layer is underneath ‘Mountains’.
Pick one of the rivers you created in your ‘Plan’ layer. You have the choice to recreate the river from scratch in the ‘Rivers’ layer, or you can cheat and tweak the one from the ‘Plan’ layer. I’m going with the second option, because it’s faster.
Unlock the ‘Plan’ layer and click on one of the rivers you created previously. Now right click, and select ‘Move to Layer’. Select ‘Rivers’ as the layer and click Move.
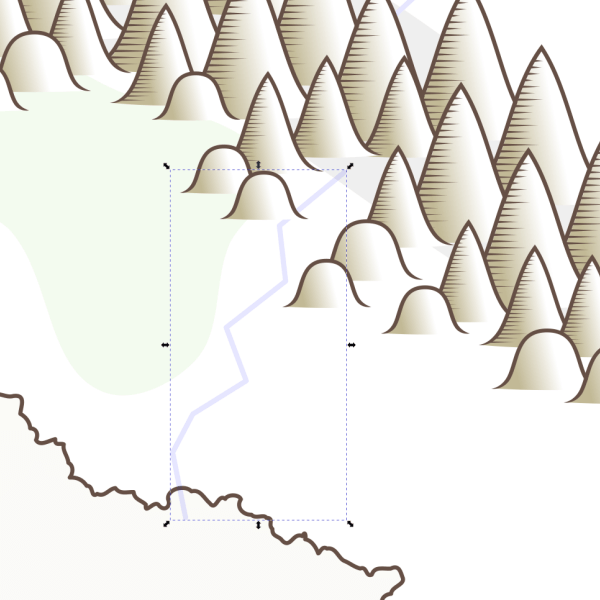
We now have a very angular, completely un-river-like object in our ‘Rivers’ layer. We’ll fix that shortly, but before we do so, if you need to tweak the course of the river, do that first. With the node tool, move any nodes that need re-positioned, so that the river path is roughly where you want it to go. Here’s my adjusted path, made by simply dragging on a few nodes.
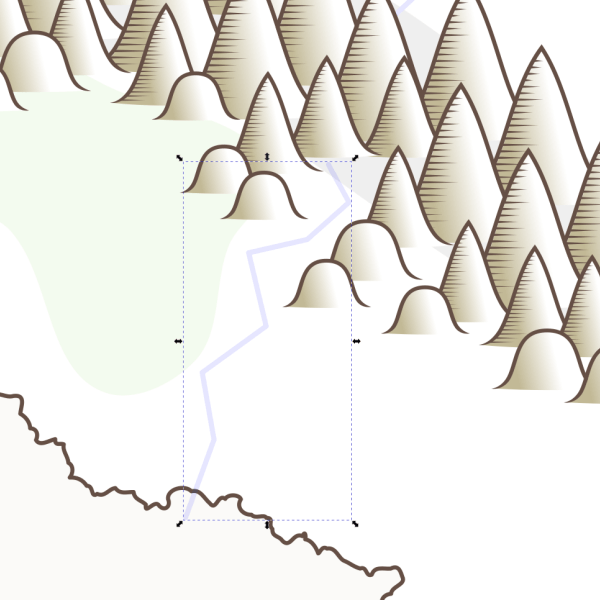
We want to introduce a little randomness to our river’s course, and to do that, we’re going to use our old friend, the Fractalize tool.
With the river selected, click Extensions > Modify Path > Fractalize. We don’t want to go overboard with this effect, or it won’t look realistic. We just want to introduce a little bit of randomness, so I’d suggest Subdivisions 1 / Smoothness 10 as a starting point, though you can adjust to suit yourself.
After running Fractalize, simplify the river a little by hitting Ctrl + L a few times.
Now, using the Node tool, drag the mouse over all the nodes in the river and convert them to Smooth, using the Smooth icon in the Node toolbar at the top of the screen. After converting to smooth, look over your river for anything that looks out of place, or a little too corner-y. Just delete any problem nodes, and convert the nodes at either side of the deletion back to Smooth (they may have changed to Corner nodes when you deleted.)
This is my new river course after fractalizing, and smoothing.
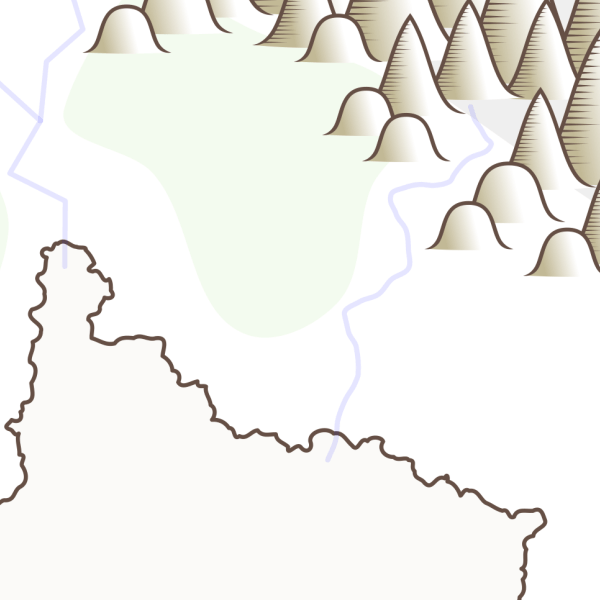
Next, we want our rivers to taper, as rivers generally start small at the source end, and grow wider at the coast end. We’ve used the ‘Taper Stroke’ path effect in the past, and we could use that again, but there’s a better tool for any path that has a bit of complexity: the Power Stroke.
Click your river to select, then click Path > Path Effects to open the Path Effects panel. Search for ‘Power Stroke’ and click it when the name comes up.
Power Stroke will add three pink-coloured diamond nodes [note, the nodes are white in later Inkscape verions] to your river path: one at each end, and one in the middle. These nodes can be moved to adjust the tapering effect. Before we do anything however, we want to set the ‘source’ end of the river to zero width.
In the options panel for the Power Stroke effect, there are dropdown menus to select the shape of the ‘start cap’ and ’end cap’. One of the options is ‘Zero width’. Now, depending on how you drew your river, the start cap may be in the sea, or it may be in the mountains. Try setting the start cap to zero width. If that’s not the right one, change it to ‘Rounded’, and make the ’end cap’ zero width. You’re aiming for a rounded end in the sea, and a zero width end in the mountain area.
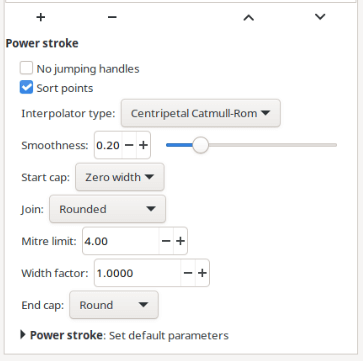
You can further adjust your river by moving the pink diamond nodes. Dragging outward on one of these nodes will thicken the stroke, and dragging inward will thin it. You can thicken your stroke at the coast end by dragging outwards on the pink node there. You can also drag this node back up the river a little to maintain that thicker stroke a little further inland. Likewise, at the source end of the river, you can extend the tapering effect further by dragging the node at that end, so that the river stays fairly thin until it’s well out of the mountains area.
If you adjust the thickness or thinness at either end, you’ll likely need to adjust the middle pink node too, just to maintain consistency.
If you’d like to thicken one small area somewhere along the course of the river (perhaps to create a wide, shallow bend), you can add additional pink nodes. Hold Ctrl and click on an existing pink node, and this will duplicate it. Drag the duplicate node along the path, and use it to adjust the line thickness as required. You can make as many duplicate nodes as you need.
When you’re satisfied with what you have, finalise the effect by clicking Path > Object to Path. This will convert your river to a filled path.
Here’s my finished river, with the colour changed to match the coastline (which I forgot to do earlier!) I usually do a small amount of tweaking to the nodes after running the above steps, just to improve the look of the rivers. It’s at most a minute or two on each river, so it’s doesn’t take especially long.
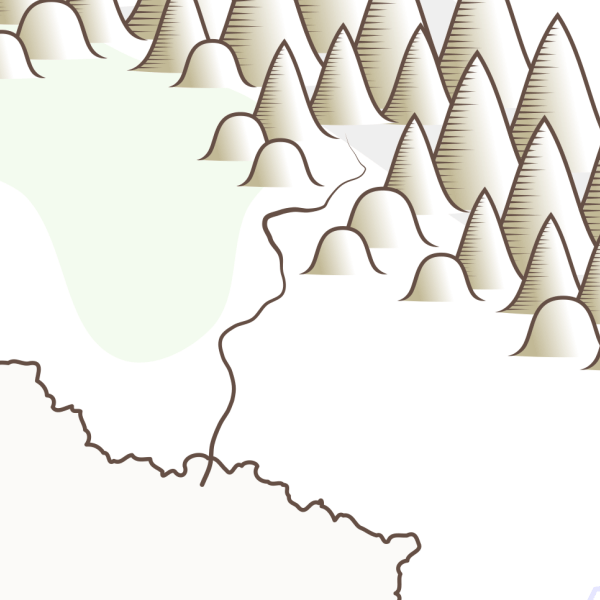
You’ll note from my screenshots that the river mouth is sticking well out into the sea. We’ll fix that at the end, once we’ve finished all our rivers. For now, make sure all your rivers extend out a bit into the sea, and we’ll deal with them all later.
Repeat the above steps working on each river individually until you’ve done them all. To quickly recap: select your river (after drawing it afresh, or moving from the ‘Plan’ layer), adjust its course if required, Fractalize, smooth the nodes, apply the Power Stroke and tweak as required, then finalise with Object to Path.
Here’s my map after fixing up all the rivers.
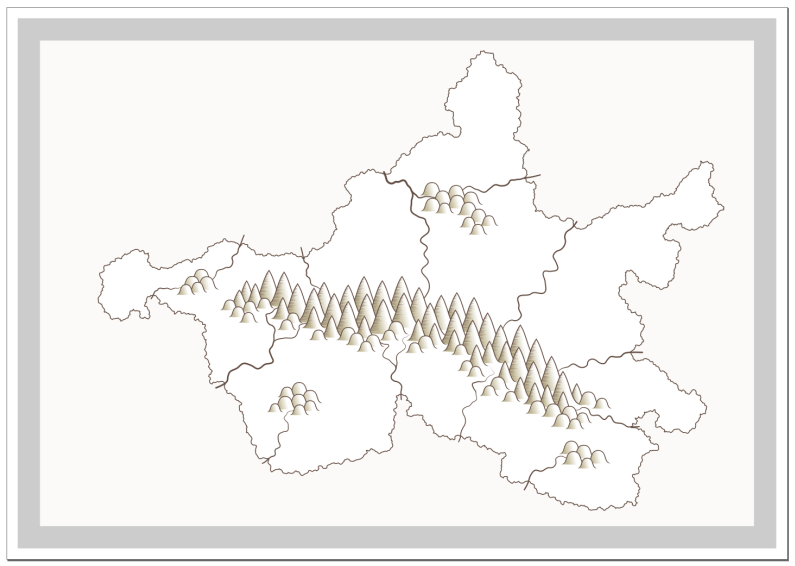
Now we’ll deal with those ends that stick into the sea.
Make sure your ‘Plan’ layer is locked again before you go any further. Next, drag the mouse over all your rivers and click Path > Union (or Ctrl + +). This combines the rivers into one single object.
Now we want to cut off the protruding bits, and we’ll do that with the Intersection command.
Unlock the ‘Island Shape’ layer temporarily. Click the island shape and press Ctrl + D to duplicate. Right click on the copy and select ‘Move to Layer’, selecting Rivers as the layer. Relock the ‘Island Shape’ layer.
Back on the Rivers layer, click the island shape, hold Shift, then click the rivers object. Now click Path > Intersection. This command will remove any bits that aren’t common to both objects. In other words, it’ll cut off the parts of the river that stick out beyond the island coast.
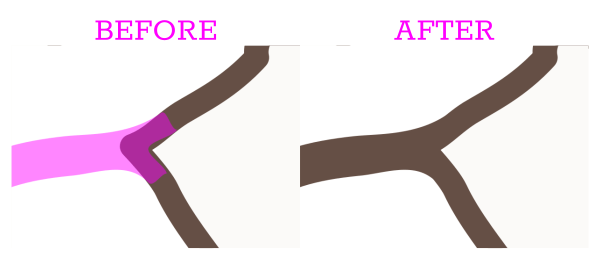
This gets us what we want, but it’s worthwhile spending a little bit of time going round the coastlines and checking what each river mouth looks like. I feel it looks much better if river mouths have something of a ‘Y’ shape where they meet the coastline. Take a look at the screenshot below.
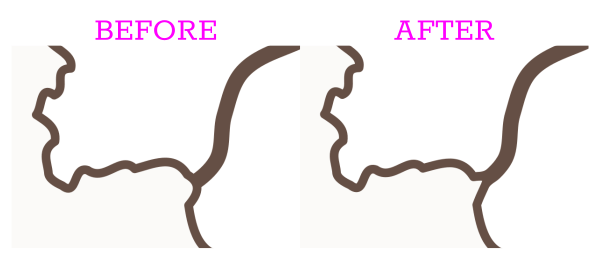
You can achieve this look by manipulating the Coastline Stroke and the Rivers object. You’ll need to unlock the ‘Coastline Stroke’ layer, and switch between that and the Rivers layer adjusting the nodes as required. It will probably help if you temporarily change your rivers colour to a different shade from the coastline, so that you can tell them apart.
Here’s an example screenshot where I’ve added a ‘Y’ shaped indent in the coastline stroke, then tweaked the river mouth so that it merges nicely into the coastline. I’ve made the river a pink colour and lowered the opacity so that you can see what I’ve done. Try to adjust the nodes at the end of the river so that they curve nicely into the coastline stroke.
This step is optional. It only takes a few minutes and improves the look of the map, but it’s your choice whether you want to spend the time.
When you’re finished, lock both the ‘Coastline Stroke’ and the ‘Rivers’ layers. Save your work and run Clean Up Document.
Here’s my latest work-in-progress after finishing up the rivers.
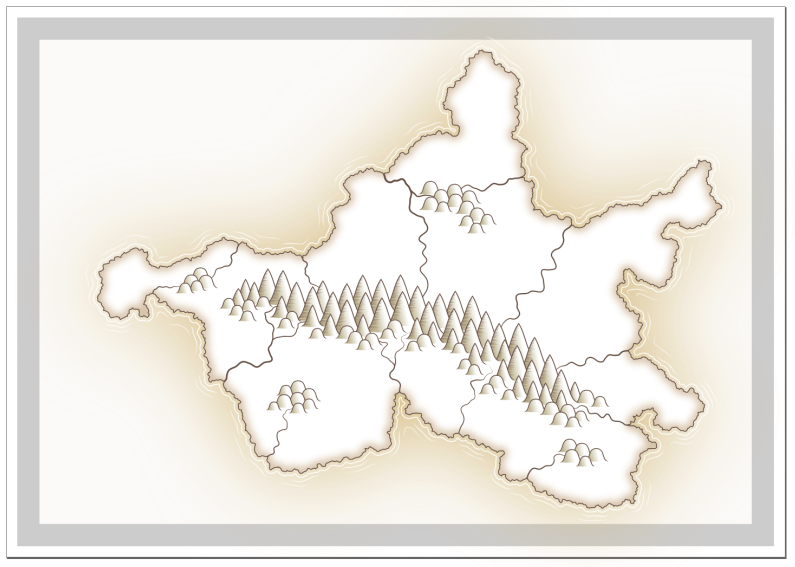
In this section, we added rivers to our map, gave them some wiggle and randomness, and improved the coastlines at the river mouths. In Part Nine, we’ll work on the forests.
Tags:
inkscape mapmaking map-tutorial