Part Seven - Positioning Mountains on the map
Posted 16 Jan 2022
Posted 16 Jan 2022
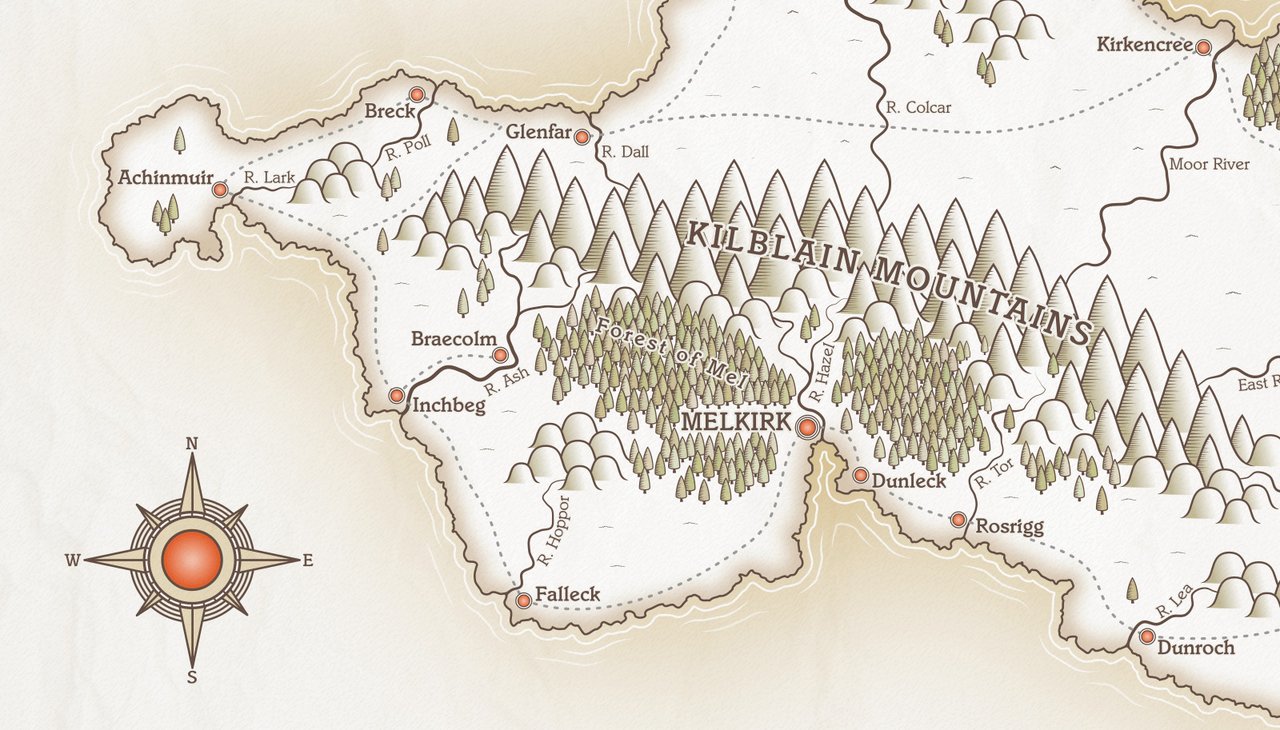
This post is the seventh part of a tutorial series that teaches how to create fantasy maps in Inkscape. We finally get to the fun stuff, and begin filling out our map. In this section, we’ll begin by placing our mountains.
Here are the other sections of the tutorial.
Now onto Part Seven!
After the last, long tutorial, this one’s much shorter, and hopefully a lot more fun. We can finally start laying down some geographical features on our island.
Before we do that, to help ease the burden on our poor PCs, we’re going to create some clones of our mountain symbols. If you’ve never used clones before, they’re simply copies of an object, and they remain connected to the original. If you change your original, all the clones will change too.
Previously, we created three mountain/hill symbols and placed them outside the document page. We’re going to click each symbol in turn and create some clones of it, and we’ll place those clones on the map.
The original symbols will remain off the main document page, so that we can easily access them if we need to. It’s not difficult to find an original symbol (you can click on a clone, then press Shift + D to look up the original.) However, if you’re moving things around, duplicating and occasionally deleting objects (I do this a lot when positioning trees), you may accidentally delete the original by mistake. This won’t delete your clones, but it’ll convert them all to new objects, which can massively increase the size of your document, so it’s not worth the risk.
The quantity of clones you’ll need is difficult to guess, because it depends so much on the area you need to fill, and that will vary for every map. I tend to think it’s better to have too many, and you can delete whatever you don’t need. Having said that, if you need some more, you can easily duplicate an existing clone with Ctrl + D , so it’s not difficult to create more. Note, it is not recommended that you create clones of clones, so don’t run Tiled Clones on a clone. Also, don’t run Tiled Clones twice on the same symbol or it’ll remove the first batch that you carefully positioned on your map, and replace with a new set positioned in neat rows next to your original symbol. I’d suggest over-estimating by a fair bit how many clones you might need, then using Ctrl + D if you should happen to need more.
So, click on the first large mountain and move this over to the side of the document page, so that we’re creating our clones off to the side of the map. Now click Edit > Clones > Create tiled clones. The Tiled Clones Panel will open at the right hand side. Before we do anything else, click the ‘Reset’ button at the bottom left of the panel. You may have used Tiled Clones before and changed some of the default settings, and this would affect the results you get. We want the simple, default cloning operation and no other effects. You should be on the Symmetry tab, with ‘P1: simple translation’ selected.
I’m going to create 60 copies of my large mountain. Make sure the boxes labelled ‘Rows, columns’ are selected, and enter any numbers than multiply to 60 (or whatever quantity you choose). In this case, I’ll enter 6 (rows) and 10 (columns). Click the Create button and the clones will be created.
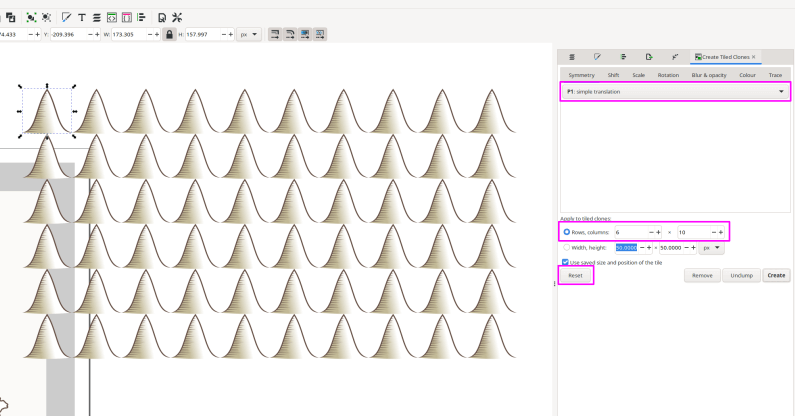
One little thing to note is that the first clone at the top left will be placed directly on top of your original object, so click the top left object and move it out the way a little. Now drag the original symbol underneath and put it back safely with your other originals. If you’re unsure if you’ve selected the original or the clone, look at the taskbar at the bottom of the screen. If it says “Group of XX objects in Layer…”, that’s the original. If it says “Clone”, well, that’s a clone!
Repeat the above steps for your smaller mountain, and for your hill. Each time, create a quantity of clones and move the original symbol away from them to avoid mixing them up.
We can now begin moving the cloned mountain symbols onto the map. Look at the plan you made earlier and use that to guide you as to where the mountains should go. Start with the large mountains and lay them along the middle of your mountainous areas. Position the smaller mountains towards the edges, finishing up with few hills at the outer edges, to give the impression of high land moving into foothills.
Take note of where your rivers begin in the mountain areas and, using the smaller mountains and hills, create valleys for the rivers to flow out from. We can always adjust the rivers if they don’t work exactly with where the mountains are positioned.
As you drag the clones onto your map, you’ll quickly notice that they aren’t in the correct stacking order. This can be easily fixed, but I recommend you push on and roughly lay out all the mountains in each area before running the fix. If you really need to adjust something immediately, you can use PageUp or PageDown to quickly raise or lower an object.
Here’s my first pass at laying down the mountains on top of my layout plan. I know that I’ll need to make some adjustments after re-stacking, but this was my starting point.
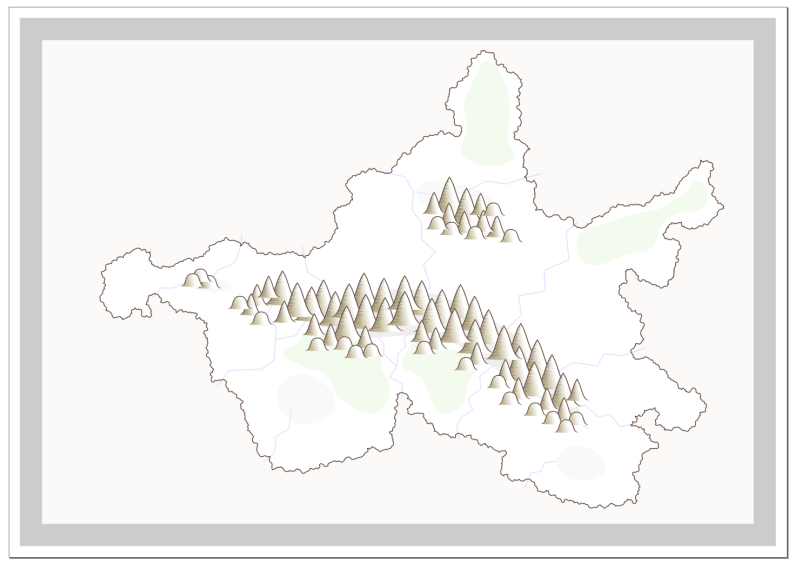
Let’s fix that annoying stacking issue.
Drag the mouse over all the mountains on your map to select them. Now click Extensions > Arrange > Restack. An options window will open where you can choose the order for re-stacking. On the ‘Based on Position’ tab, I have ‘Top to Bottom’ as the ‘Direction’, ‘Left’ as the Horizontal option, and ‘Bottom’ as the vertical option.
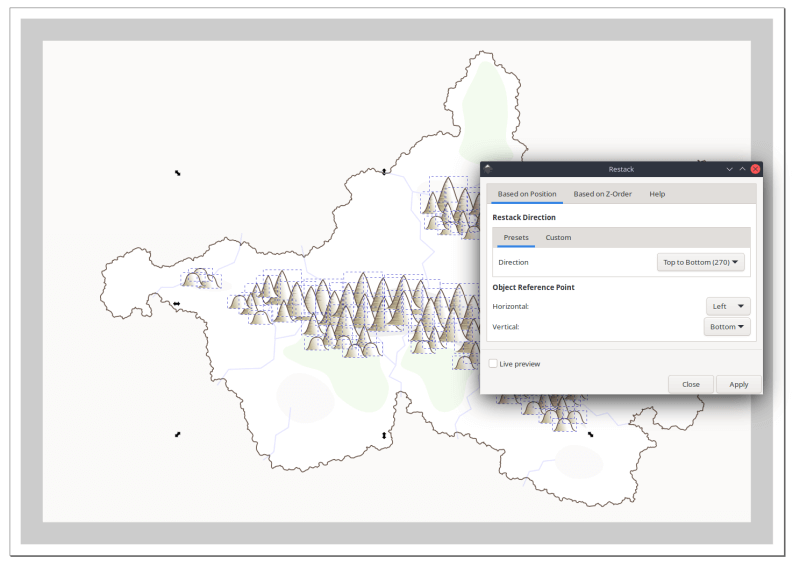
Let the Restacking tool run, and see how it works. If these settings didn’t work for you, you may need to try some of the other options.
Note, if you have a lot of objects, the Restack tool can take quite a while. I worked on a map once that had close to ten thousand trees, and restacking even a couple of hundred objects took forever. It never failed me, but it took so long that I was sure the program had crashed. But really, all I needed was some patience. So don’t panic if Restack seems to take a while. Just sit back and let it do its thing. It’ll be fine.
Here are my results after the restack…
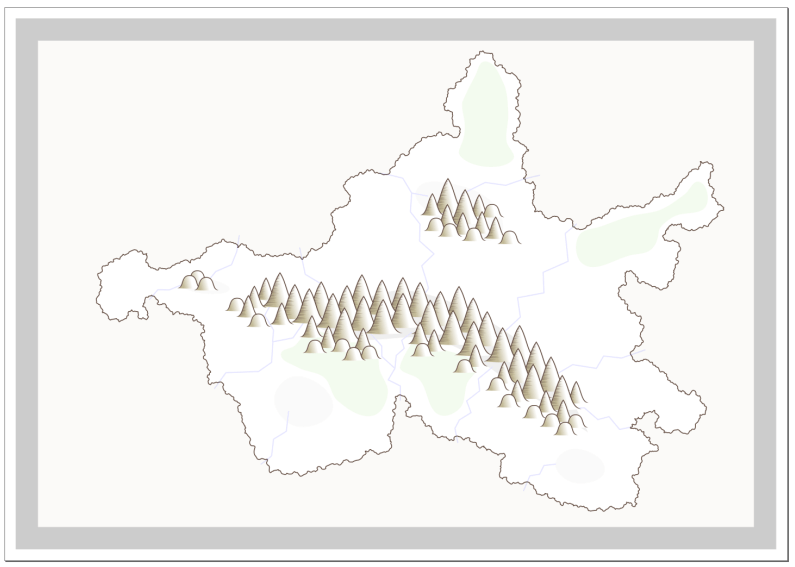
That’s looking a lot better. Now we can see more clearly.
Once you have a basic layout for your mountains in place, start fine-tuning their positions. You’ll probably move objects, change your mind, move them again, delete some, then bring in new ones to replace the ones you deleted earlier! It’s all part of the process. One of massive plus points in creating a vector map is that it’s so easy to reposition objects whenever you want.
After a bit of tweaking and re-doing, this is my latest work-in-progress after completing this section (with all layers turned on). I decided, on a whim, to make a smaller hill, in addition to the original one. If you feel you’d like a smaller hill too, you have the skills to create one. It’s the same process we used to create the second smaller mountain, followed by another Tiled Clones process.
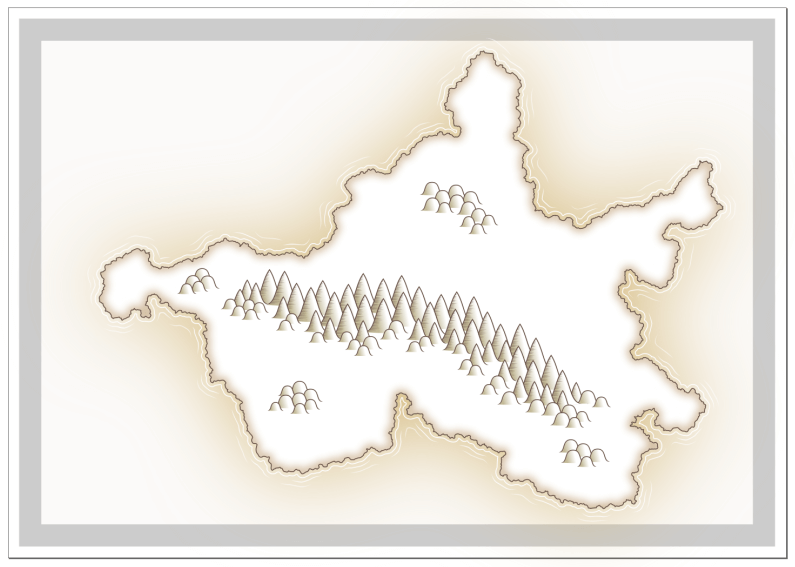
I’ll need to make some adjustments to my river plan, but we can do that in the next tutorial. Before we finish here, delete any unused clones, then save your work and run Clean Up Document.
In this section, we finally started filling out the map with some mountain symbols, based on our layout plan. In Part Eight, we’ll sort out our rivers.
Tags:
inkscape mapmaking map-tutorial