Part Five - Make a plan
Posted 13 Jan 2022
Posted 13 Jan 2022
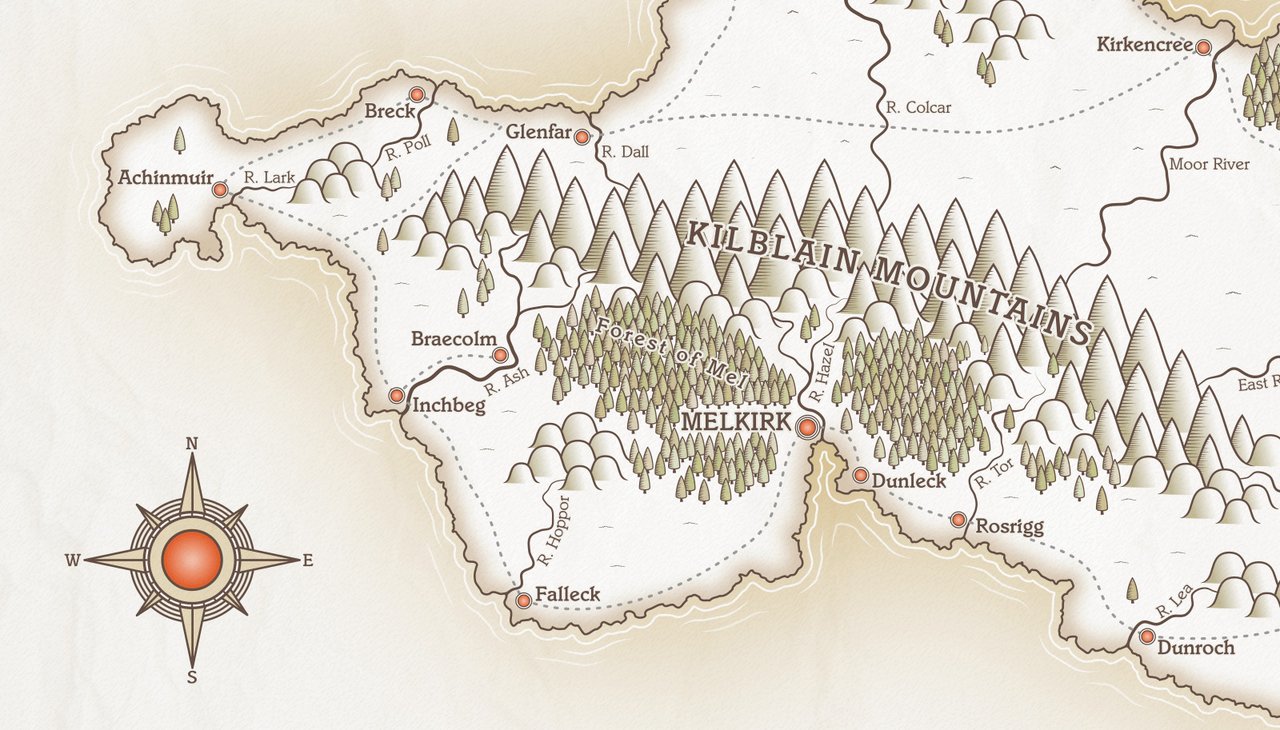
This post is the fifth part of a tutorial series that teaches how to create fantasy maps in Inkscape. In this part, we’re going to spend a short time planning the location of various features of the map, including mountains, rivers and forests.
Here are the other sections of the tutorial.
Now onto Part Five!
We’re going to take a brief pause before we dive into creating our mountains, rivers, forests and settlements. It’s important to give some thought on where you’re going to place these features, and that you don’t just plonk them down anywhere!
There are many help articles about this topic, written by people far more knowledgeable than me, so it’s worthwhile doing a little research before you start. But here are a few things to consider…
There are numerous articles and books about this topic, and you can go as in-depth as you want. This tutorial is working on a simpler level, however. We just want to avoid making any obvious, jarring errors!
Let’s create a layer called ‘Plan’ at the top of the layer stack (your island shape layer should be visible, but locked.)
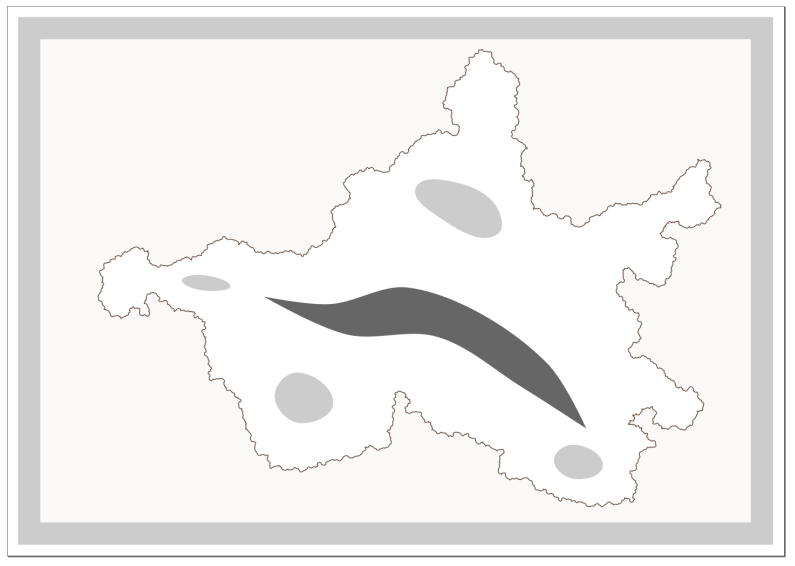
Pick a dark grey fill colour and use the Bezier tool to draw a long-ish ‘blob’ for where your mountains will go. Mountains generally form ‘chains’, rather than being single isolated peaks, so I’d recommend drawing your blob with that in mind. There’s a lot goes into the geology of mountains, but that’s not the focus of this tutorial, so I’m going with a main mountain chain along the ‘backbone’ of my island. I’ll create a few separate hilly areas in a lighter grey colour too.
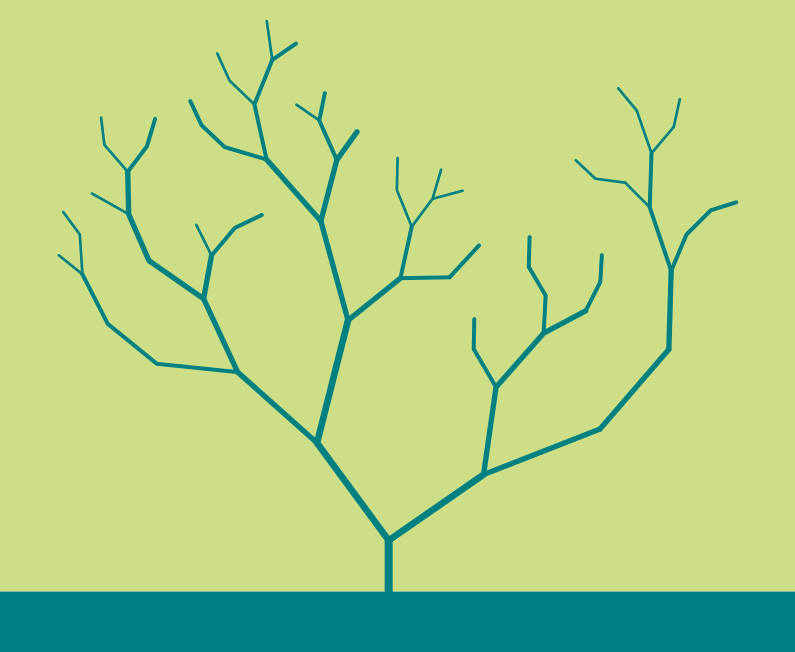
Think about your rivers now. Rivers always flow from high ground toward the coast, so the source of your rivers will be found in the mountains or hilly areas. Rivers ‘join’. They don’t ‘split’. To clarify: river systems develop like a tree. The trunk area at the bottom is where the river flows out to sea. At the other end, we have tributaries (branches) that join and get wider as they get closer to the trunk. Rivers won’t randomly split in two in the middle of a plain, leading to two outlets at the coast. (Deltas may give the impression of this, but they’re not really splitting. It’s the same river divided into channels by built-up sediment.) Also, rivers won’t flow from one side of an island/continent to the other. Water always flows from high to low, not ‘across’.
Here’s an example, using a (slightly modified) creation from Inkscape’s wonderful ‘Random Tree’ tool (Extensions > Render > Random Tree). Do you see how the ‘branches’ join as they get closer to the ’trunk’? I’m not suggesting you create rivers as complex as shown here, but this is a perfect example of how river systems generally work.
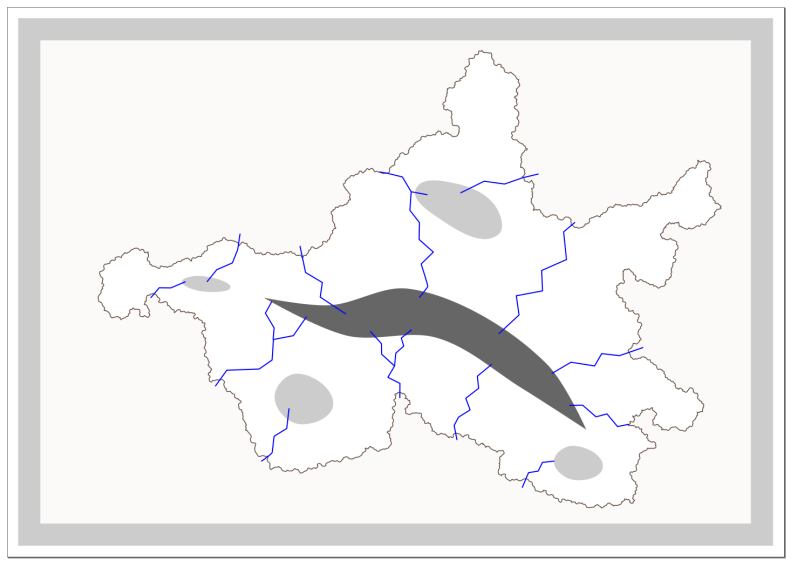
So, grab your Bezier tool, set a blue stroke colour, and draw some zig-zagging rivers from the mountain and hilly areas to the coastline. Don’t worry about creating smooth curves at this stage. Just zig-zag all the way to the coasts. Have some of your rivers connect as they flow down from the mountains. How many rivers you create is up to you. Depending on the scale of map, not all rivers would show, so you have some flexibility. I’d recommend at least half a dozen however. Here’s my sketch so far.
The final thing we’re going to plan for at this stage is our forests. We want a few forest areas, perhaps some close to our settlements, as islanders need timber for building, fires etc. So pick a green colour and draw another couple of blobs for your main forest areas. We can easily add small woods later, so don’t worry about those right now. Just lay down a couple of large forests.
Here’s my final plan.
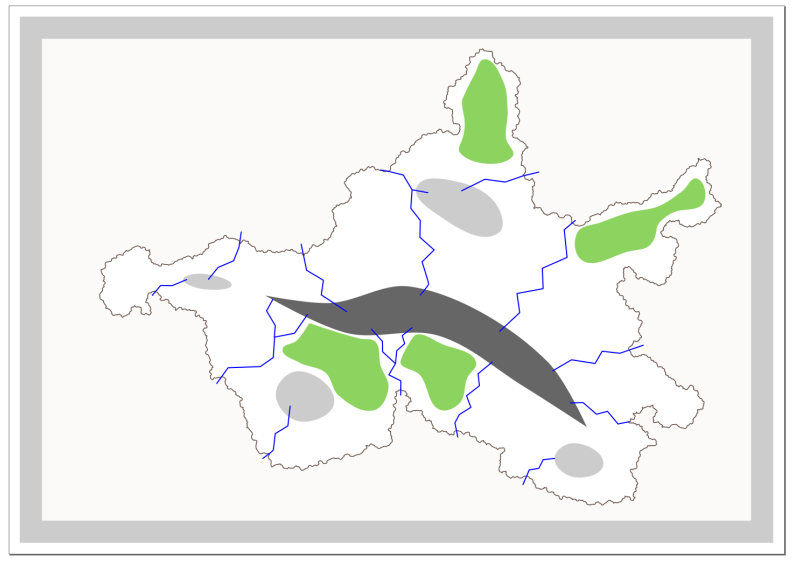
Remember, these layout plans are not set in stone, and you can change them as you further develop your map. It is extremely useful, however, to have a rough idea before you begin.
We’re now ready to start work on the rest of the map. Before we do so, lock the ‘Plan’ layer and set its opacity to somewhere around 10 - 15%. We want to be able to see the plan, but don’t want it to overwhelm. With that done, save your work and move on to the next part.
In this section, we created a layout for the main geographical features on the map. In Part Six, we’ll begin the mountains.
Tags:
inkscape mapmaking map-tutorial