Part One - Introduction to vector mapping
Posted 04 Jan 2022
Posted 04 Jan 2022

This post is the first part of a series that explains how to create fantasy maps in Inkscape. This part is primarily an introduction to the series, and a guide to setting up your document before we begin.
Here are the other sections of the tutorial.
If you’re a relatively new Inkscape user, you should still be able to complete the tutorial without any problems. I’ve written it with new-ish users in mind. If you’re an absolute beginner, on the other hand, with no experience whatsoever, you may manage it, but it’ll probably be a struggle. You don’t need any kind of high-level skills to follow along, but you do need to understand the basics. If you can do everything in the list below, you’ll be fine.
If you’re still learning the basics, I’d suggest watching a few Youtube videos first. Logos by Nick is a great place to start.
If you’re a reasonably experienced Inkscape user, there’s really nothing here that you couldn’t figure out on your own, but I hope the tutorial might serve as a guideline with a few pointers to help you along. The text is fairly wordy because I’m explaining basic procedures for inexperienced users. If you understand what I’m doing, you’ll be able to zip through the various steps pretty quickly. There may be better ways to do some of the things explained here, but I guess this is my way!
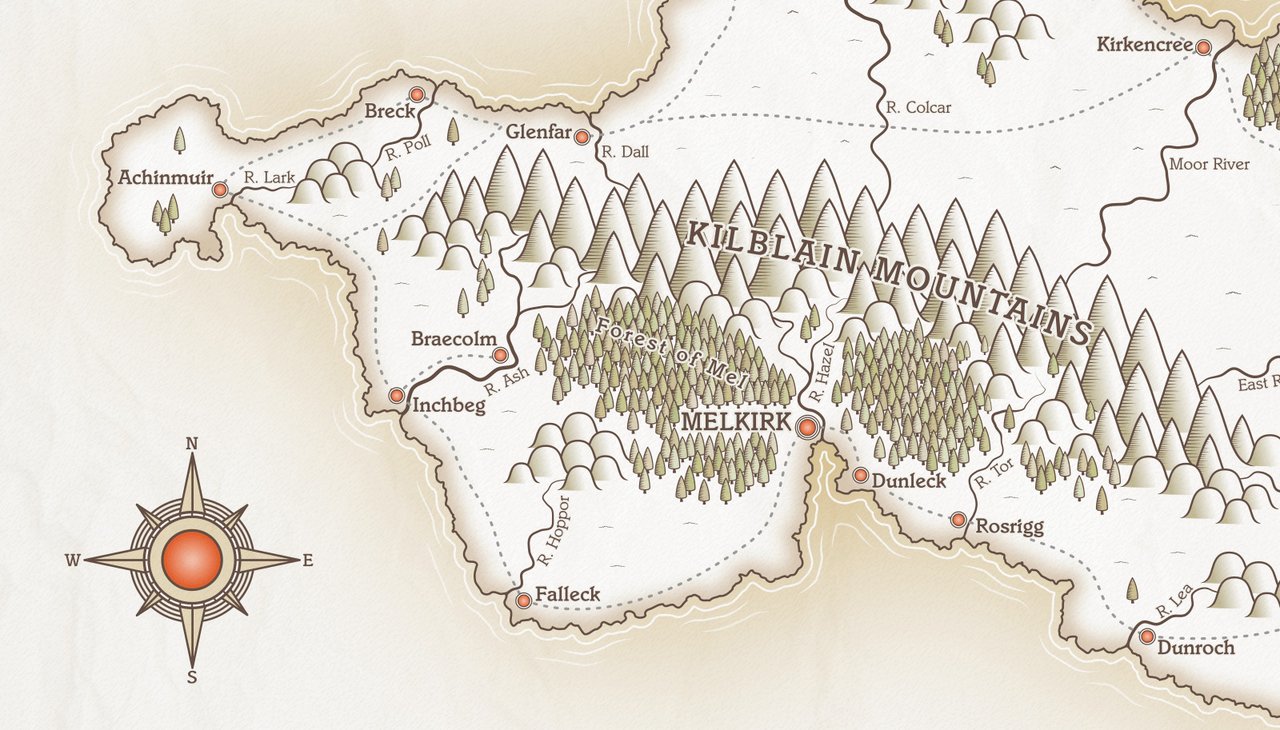
Speaking a little more generally, you don’t need to be an amazing artist to work through this tutorial either. If you have decent art skills, lucky you, I’m envious! But if your skills are a little on the mediocre side, don’t worry. It’s quite easy to produce an attractive and legible map that can be used for D & D games or to illustrate your next fantasy novel. Hand-drawing skills are not a necessity.
In this tutorial, we’re going to make an island, partly because islands are my very favourite thing to create, but mostly because they’re a complete little world of their own, and make a good subject to introduce some map-making concepts within the tutorial. The skills learned here can easily translate to continent or world mapping.
I’ve written this tutorial using the latest version of Inkscape which, at the time of publishing, is version 1.1.1. If you’re not running this version, I’d suggest installing the latest available version if you can. You can check which version you have via the menu Help > About Inkscape. Some of the functions used in the tutorial may not be available or may work differently in earlier versions of the software. Always download from the official site at inkscape.org
It’s very, VERY important to save your work regularly. Get into the habit of hitting Ctrl + S often. Sadly, Inkscape can be a bit crashy sometimes, especially if you push your PC to its limits. I would also recommend running File > Clean Up Document from time to time. If you’ve been creating and deleting many objects and gradients, these can start to accumulate in your file making it larger than necessary. The Clean Up tool only takes a second, and I find it regularly removes unused elements.
Another recommendation is to set up Autosave, if you haven’t done this already. Here are instructions on how to set up Inkscape’s Autosave feature.
With the introductions out the way, let’s begin!
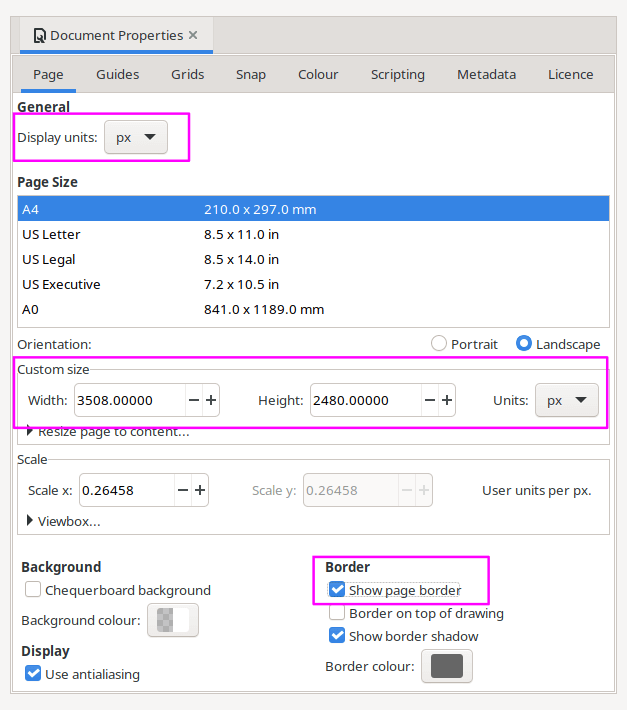
Launch Inkscape, then open File > Document Properties. There are a few settings we need to apply here.

Firstly, set the Display units to pixels.
Next, set the page size. Enter the dimensions of your document, and you may wish to start with something small initially. For this tutorial though, I’m working on a page size of A4 at 300dpi. Inkscape has A4 as one of its preset page sizes, however that will only output at 96dpi, and if you’re printing your map you may wish for a little higher quality. Therefore, in the Custom size boxes, set the page sizes as follows:
Width: 3508px
Height: 2480px
I would also suggest that you tick the box marked Show page border (under the Border heading). It’s useful to see the edge of the page when making your map.
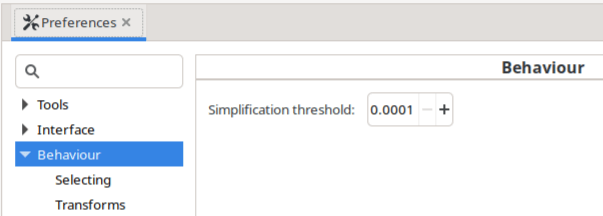
There’s one other adjustment I like to make before we start. During the tutorial we’ll use Inkscape’s ‘Simplification’ tool, however I find the default setting to be just a little too high, and I prefer a lower value. To change this, open Edit > Preferences, then click on the Behaviour tab on the left. You’ll see a box on right labelled ‘Simplification threshold’. Set this to its lowest value which is ‘0.0001’. If you use this tool often and like the value it’s normally set at, make a note of the number somewhere and change it back when you’ve finished the tutorial.

Remember to save your work!
I’m trying to break down these tutorials into bite-size pieces, so as not to overwhelm with Too Much Information(!) therefore I’ll end Part One here.
In this section, we’ve clarified who the tutorial is for, checked our Inkscape installation, and set up our document. I realise that may not seem much for a couple of screenfuls of text, but it’s important to start from a solid foundation. In Part Two, we’ll set about making our island shape.
Tags:
inkscape mapmaking map-tutorial