Part Fourteen - Adding texture and grunge, and exporting your map.
Posted 17 Sep 2022
Posted 17 Sep 2022

This post is the fourteenth part of a tutorial series that teaches how to create fantasy maps in Inkscape. This part deals with adding a little texture and a paper effect to the map. It’ll also briefly cover how to export your map.
Here are the other sections of the tutorial.
Now onto Part Fourteen!
We’re pretty much done with creating the map, and these final steps are optional. Especially if your PC is struggling to keep up!
Just a quick note… if your PC is struggling and you don’t think you can push it any further, consider making a copy of your file (via File > Save a copy) and rasterizing some of the layers. You can do this by selecting all objects and clicking Edit > Make Bitmap Copy. You should ALWAYS keep the original file with the vector objects, in case you need to edit anything in the future, so make sure you keep the rasterized version completely separate from the vector copy.
Another option to consider, when adding texture, is to use Gimp for this part. You can export a PNG from Inkscape and open it in Gimp, then add parchment effects there. You’d only be dealing with a couple of layers, since your entire map is included in the PNG, so that might ease the burden a little.
But moving on… here are a couple of options to break up the clean ‘vector’ look of your map.
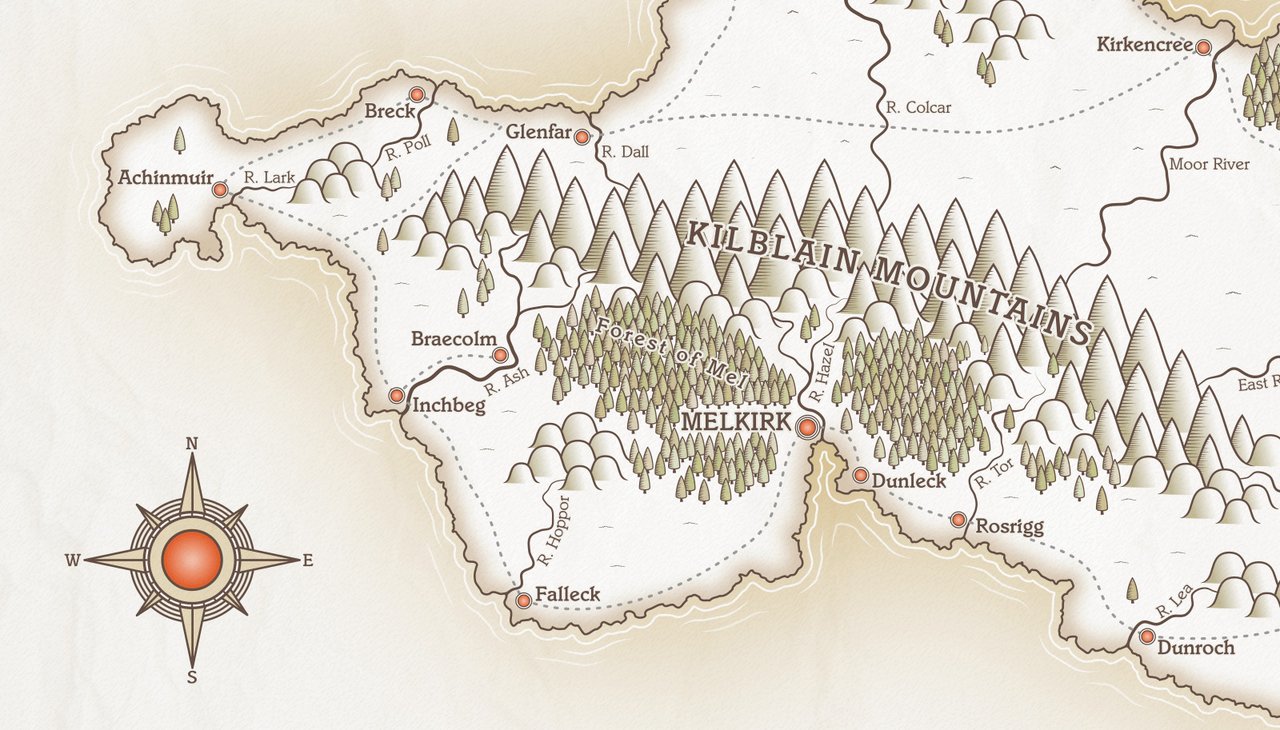
Most of the empty land is our map is plain white (the island background colour). You can break up the clean look of this by adding a little ground texture.
Create some grungy marks, either some squiggles, or perhaps a little grass icon, and place some of these in the empty areas to indicate plains or moors, or suchlike. Something like this…

Make an object similar to the above, click it once to select, then use the ‘Spray’ tool to randomly drop clones of the shape over your map. Activate the Spray tool by pressing ‘A’. A great advantage of this tool is that you can set it to vary the size of the squiggles quite dramatically. (I’ve mentioned a few times already that it’s important to try to keep your line art relatively consistent, however I don’t think this is quite so essential for ground texture.)
I’d advise keeping the settings of the Spray tool relatively low, or you’ll end up with clones everywhere! You’ll need to experiment to find what works for you, but try setting the width to about 20, and the amount to around 8 - 10, and see how that works. Set the Scale to 50 or above and see how it looks. I set Scatter to 100 to maximise the ‘spray’. I was working with a mouse, and I suspect if you’re using a tablet with pressure, you may prefer entirely different settings.
Who doesn’t love an old treasure map on grungy paper? This type of look is almost the antithesis of vector design, but it’s still possible to mimic it somewhat by applying a paper or parchment texture on top of your work, or by running one of Inkscape’s filters.
There’s some information and example pics on Inkscape’s filters on Tavmjong Bah’s website, though I’m not sure how up to date it is. The best method is to try them and see what works for you.
I’d suggest creating a new layer called Filters and place it above all existing layers. Unlock the Background layer temporarily and duplicate the rectangle there, and move this to the Filters layer (then relock the Background!)
Apply some of the Filters to this rectangle to see how they look, though I strongly suggest you do this in conjunction with adjusting the layer opacity and possibly the layer blend mode too. Something that’s unusable at 100% opacity might add a nice effect if set to 15% and Overlay blend mode. I quite like the Paper Bump effect (it’s located at Filters > Bumps > Paper Bump) and used it in this map. However, I’ve set it to 5% opacity and Multiply blend mode, because the effect is far too strong otherwise. You can see which filter has been applied to an object by looking at the taskbar at the bottom of the screen. If you don’t like what you have and want to remove it, click Filters > Remove Filters.
Another option is to import a JPG or PNG paper texture and place it in its own layer at the top, then, once again, adjust opacity and layer blend mode. Multiply, Screen, and Overlay are useful blend modes worth trying, and turn the opacity down relatively low (try around 10 - 15% as a starting point). This can give some texture and some ‘grunge’ to your map without drowning out the design.
There are loads of free paper textures online, or you can make your own in Gimp quite easily.
If you really want to go all in with texture, it’d probably be best to export a PNG of your map and open this in Gimp, or other image editor of your choice. Inkscape is an amazing program, but it’s primarily about SVG/vector graphic creation. If you want to add bitmap effects, you need bitmap software, and that’s not Inkscape. I often use Gimp in conjunction with Inkscape for map-making, and they make a killer combo.
Oh, and talking of exporting, you do know how to do that, right…?
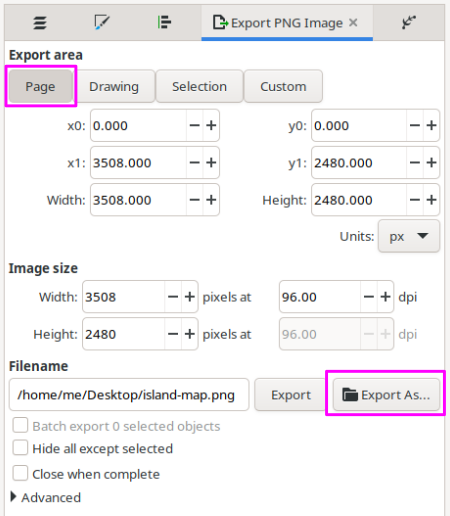
Inkscape’s method of exporting occasionally catches out new users, as they end up with a PNG that only shows half the picture. Click File > Export to open the Export panel at the right of the screen. There are various options to export different parts of the canvas, but in our case you should click the ‘Page’ tab. You can select the destination folder by clicking the ‘Export As’ button, navigating to the correct folder, then click Save.
In newer Inkscape versions, you can also select the file type you want to export. A PNG is a higher quality image, but has a correspondingly larger file size. JPGs are good if you want to share your map on a website. Webp is a relatively new format that is also good for websites. If file size is an issue for you, try exporting to JPG and WEBP and comparing what you have to see which looks best.

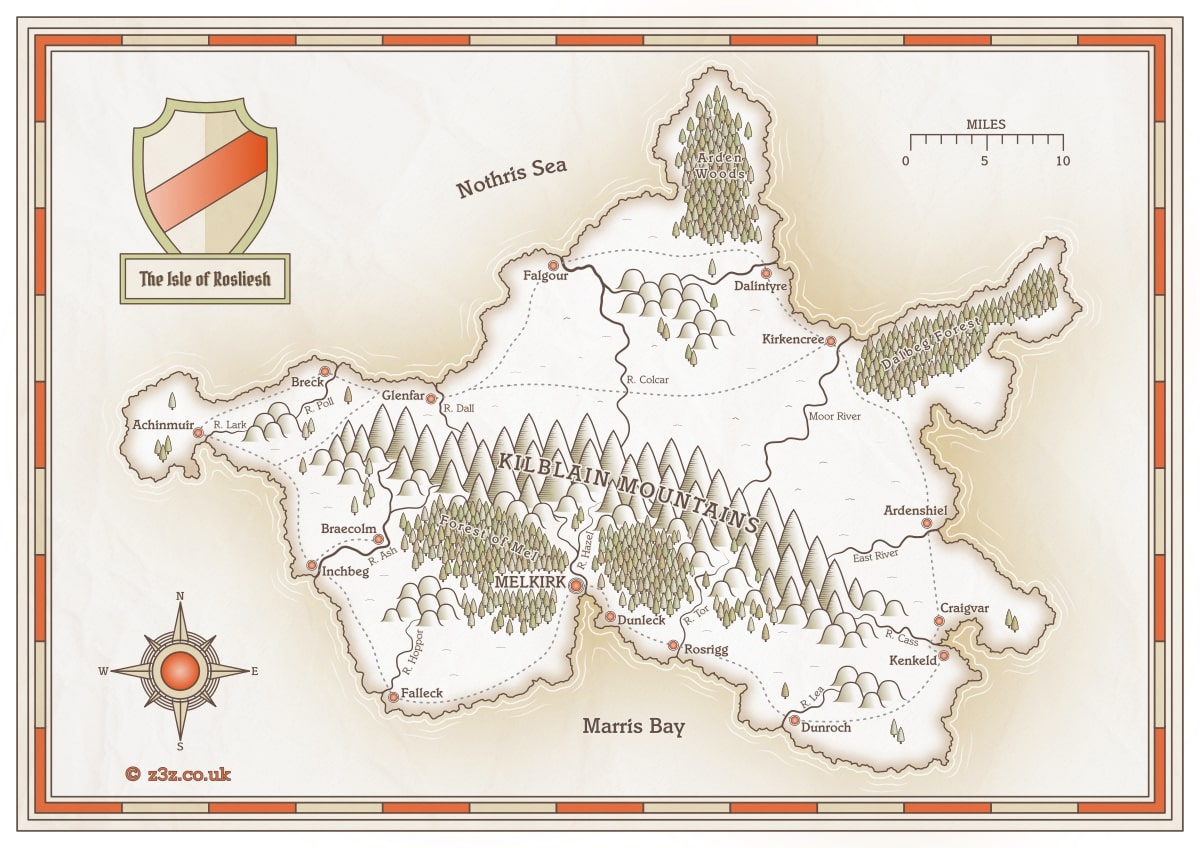
The tutorial itself is finished, but I’ll write a few closing thoughts in another article soon. Thanks for sticking with it and enjoy your map! Here’s my final work after adding some texture.

Congratulations if you’ve made it this far! I hope you have a wonderful map to share.
Tags:
inkscape mapmaking map-tutorial